Sell on WooCommerce, then fulfill, invoice and restock in Odoo
This WooCommerce Odoo integration imports your store's orders as Odoo sale orders, with their shipping, fee and coupon lines. Stock moves both ways, and WooCommerce is set to completed once you validate the delivery. Connect one store or several.
- Odoo 17.0 – 20.0
- Community & Enterprise
- Odoo.sh · On-premise
-
Not for
Odoo Online
Top seller on the Odoo Apps Store
- sales on the Odoo Apps Store
- 3,000+
- apps published
- 100+
- countries running them
- 100+
WooCommerce order and stock work before and after the connector
Without the connector by hand
-
Retype store orders into Odoo with their shipping, fee and discount lines.
-
Create each buyer's billing and delivery contact by hand.
-
Edit stock counts in WordPress after every Odoo delivery.
-
Upload new products, prices and images to the store one at a time.
-
Mark shipped orders completed in the WooCommerce admin.
-
Issue a refund in the store, then record it again in Odoo.
-
Check the store for canceled orders before you invoice.
With the connector automatic
-
Orders import as Odoo sale orders with those lines, on the schedule you set.
-
Billing, delivery and company contacts are created while the order imports.
-
Stock export can run on a schedule you set once you switch the job on.
-
One export sends up to 80 listings with price, stock and images.
-
Validate the delivery, and the order is set to completed in WooCommerce.
-
Click Refund In WooCommerce, pick restock, and the store is updated.
-
Orders canceled in the store are canceled in Odoo at the next import.
Orders, customers, stock and prices between WooCommerce and Odoo
Every object the connector handles, which way it travels and what triggers it.
| Data | Direction | What happens & when |
|---|---|---|
| Orders |

 WooCommerce to Odoo
|
A schedule you set, a new order in the store, or a manual import. |
| Billing and delivery contacts |
WooCommerce to Odoo
|
Created or reused while an order is imported. |
| Products and variants |
Both ways
|
Import Listings, or an export or update you run from Odoo. |
| Stock levels |
Both ways
|
A manual export or import, or the stock jobs you switch on. |
| Prices |
Odoo to WooCommerce
|
The Update Prices operation, or the daily price job when active. |
| Product images |
Both ways
|
Included with product import, export and update operations. |
| Product categories |
WooCommerce to Odoo
|
An imported product referencing them, or the Import Categories operation. |
| Product tags |
Both ways
|
The Import Tags operation, then sent back with product export and update. |
| Completed order status |
Odoo to WooCommerce
|
A fully validated delivery, then your click or the status job. |
| Refunds |
Odoo to WooCommerce
|
You confirm Refund In WooCommerce on the imported sale order. |
| Order cancellation |
Both ways
|
You click Cancel In WooCommerce, or the store reports it canceled. |
| Mapped extra store fields |
Both ways
|
Runs with customer, listing and order imports and tracking export. |
Odoo WooCommerce Integration features
Import orders with shipping and fees
Store orders become Odoo sale orders carrying their line items, shipping and fee lines. Discounts and coupon codes come across with them. You can fetch everything changed inside a date range, or type specific WooCommerce order numbers when you only need a few. Only orders whose store status matches your filter are imported, and Processing is the default.
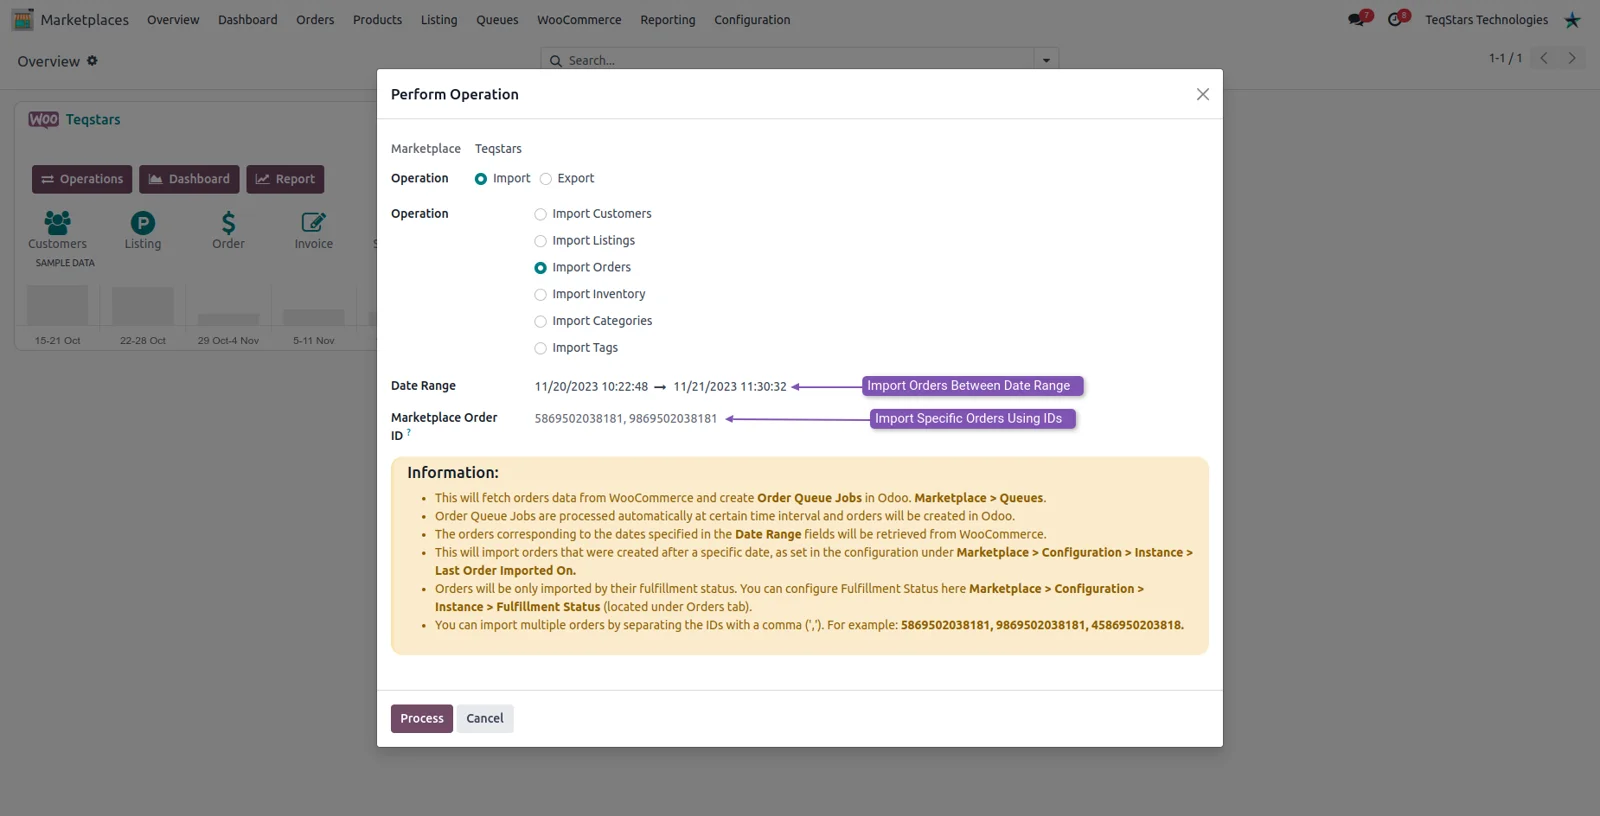
Run every import from one screen
The Operations button on your store card opens a single wizard for imports. Pick products, categories, tags or stock, set the options and click Process. Product imports create listings and variants in Odoo with name, description, SKU, weight and images. You choose whether existing listings are overwritten and whether the imported price is written into the store pricelist.
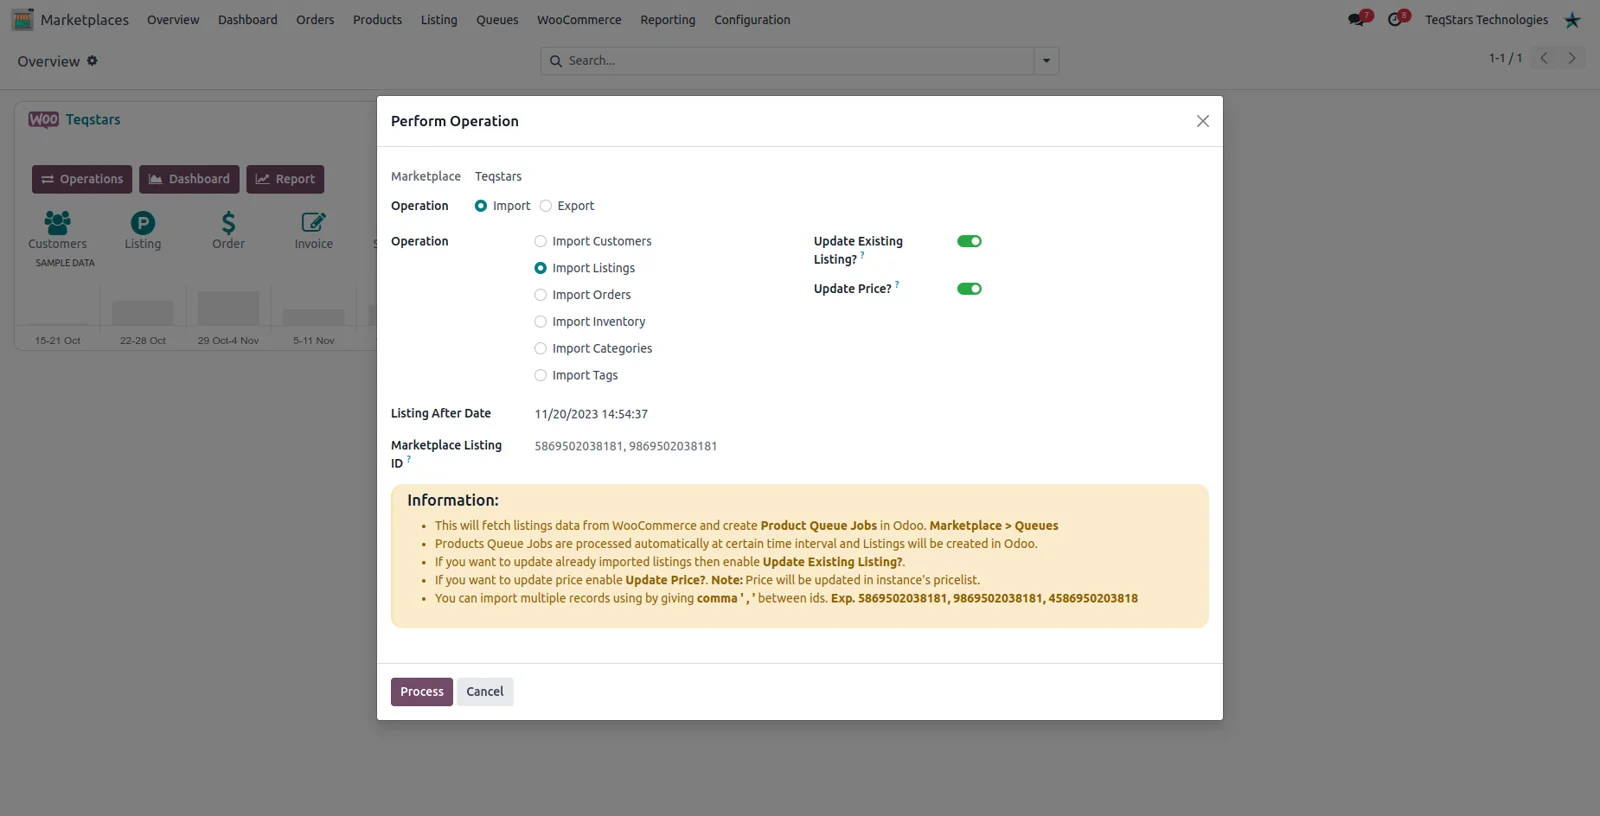
Publish products with their variants
Add Odoo products to listings, fill in categories, tags, weight and attributes, then export. A single run sends up to 80 listings, including description, price, stock and one image per variant. You decide whether each product appears as published or as a draft. Simple and variable products both work, and every variant needs its own internal reference, since WooCommerce matches on SKU.
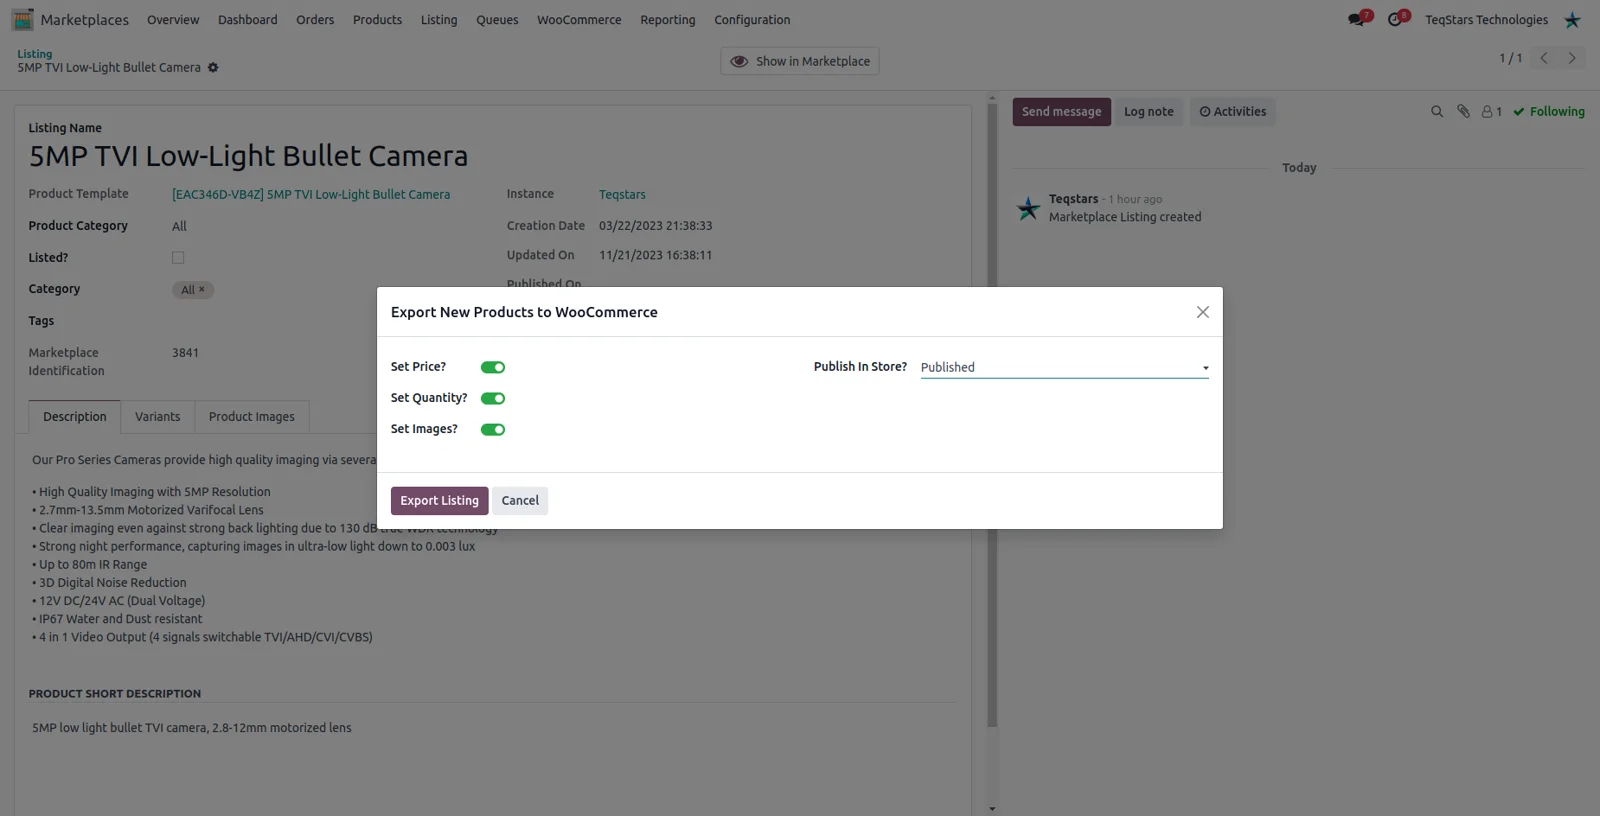
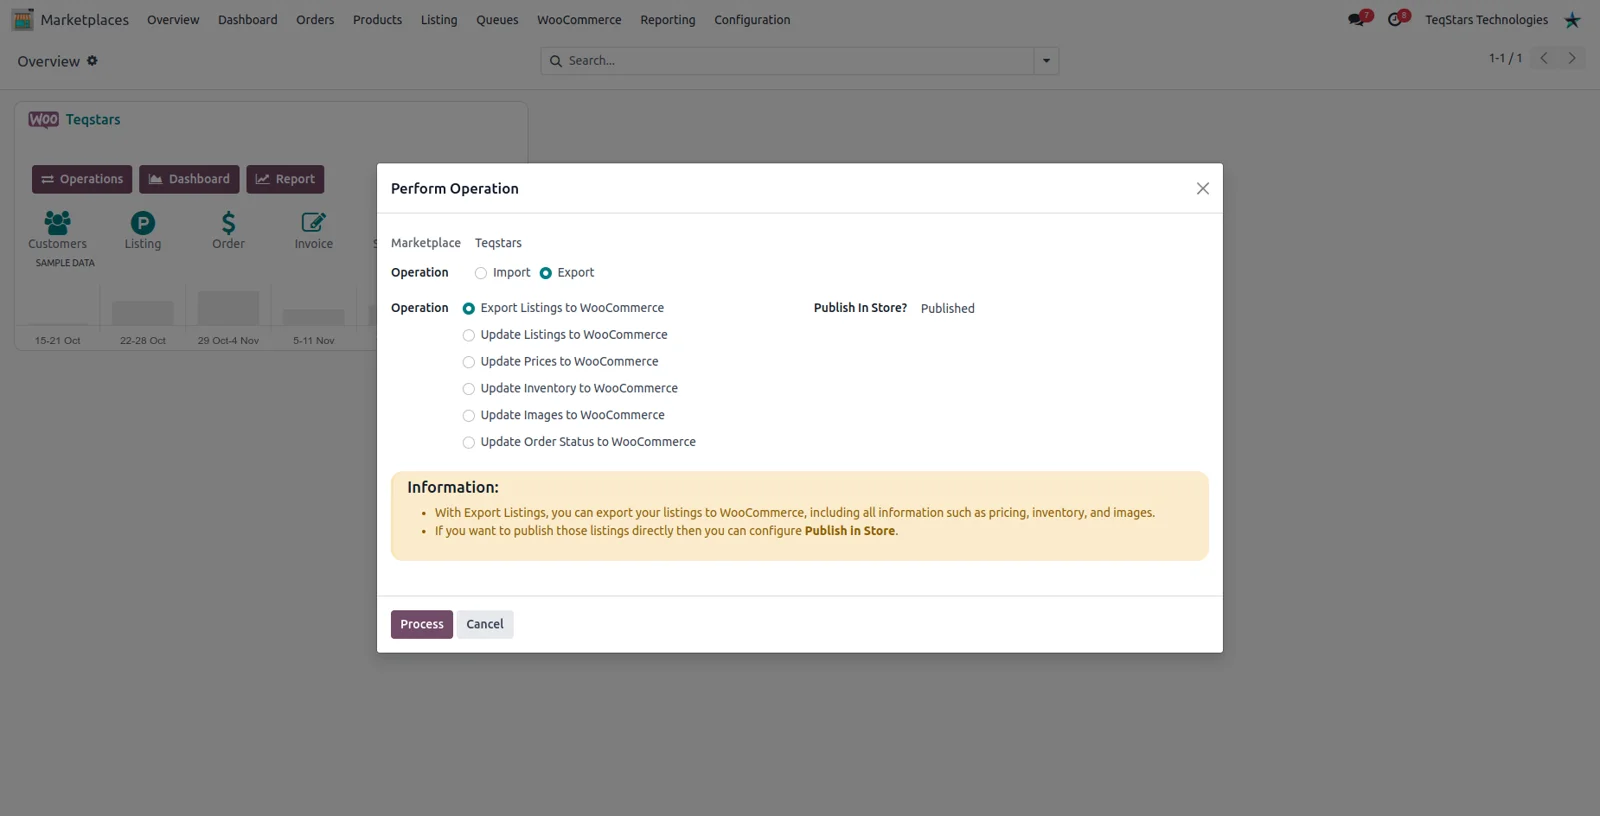
Send Odoo stock and prices to the store
The export side of the same wizard updates what shoppers see. Update Inventory sends the quantity your Stock Based On setting produces, either On Hand, Forecasted or Free To Use, for variants with Manage Stock? enabled. Update Prices sends the regular and sale price of each variant from the store pricelist, and skips any listing priced at zero.
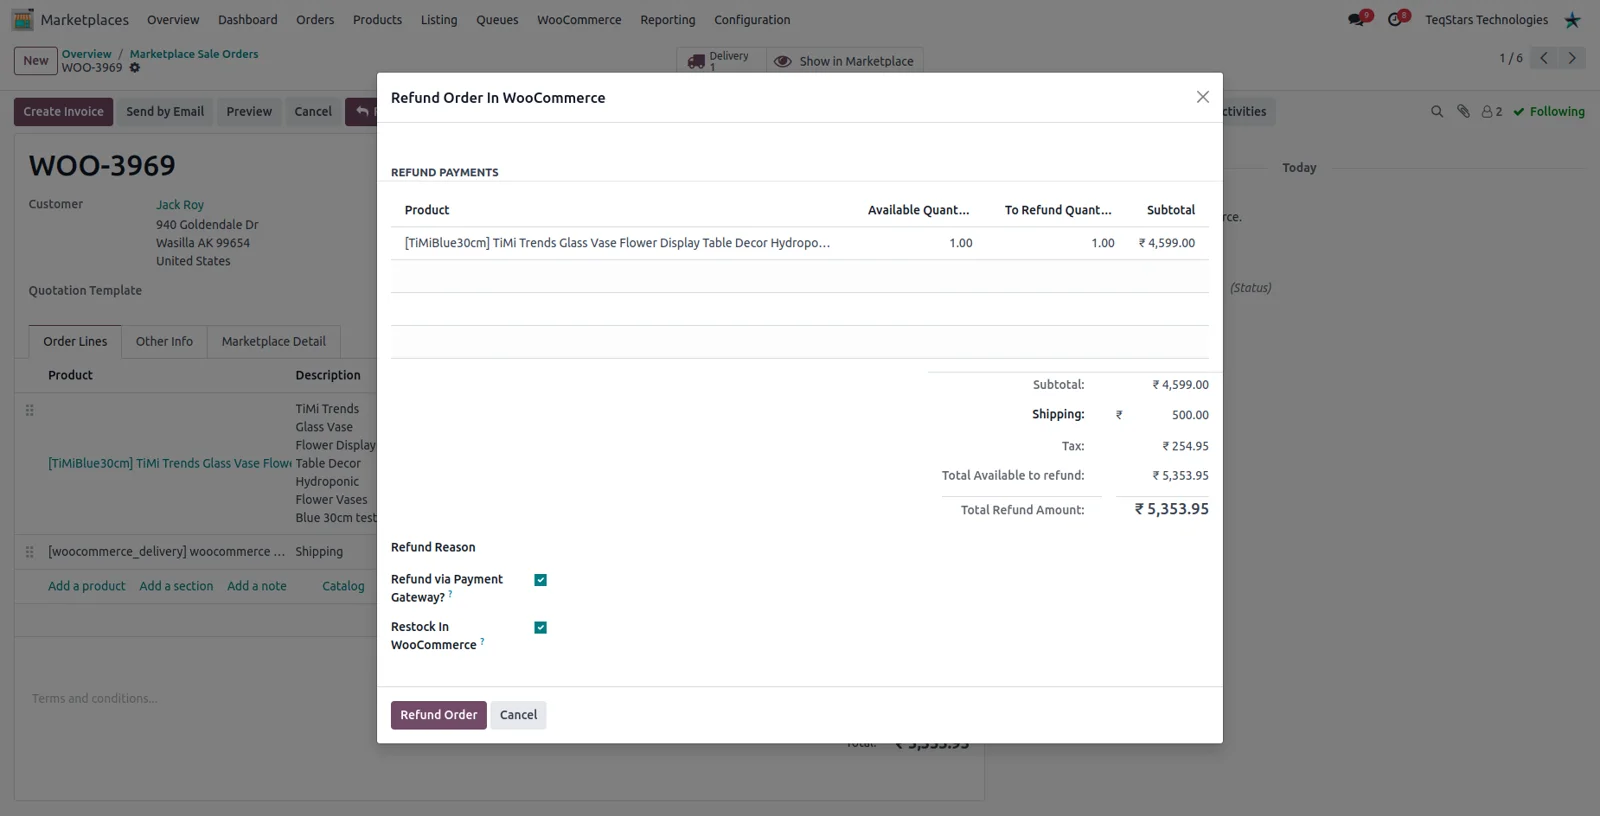
Refund an order from the sale order
Open the imported sale order and click Refund In WooCommerce. You set the quantity to refund per line and adjust the shipping and tax amounts. Tick Restock In WooCommerce to put the goods back into store stock, and Refund via Payment Gateway? to have the gateway handle the money. When the store already refunded the buyer, mark the Odoo order refunded instead.
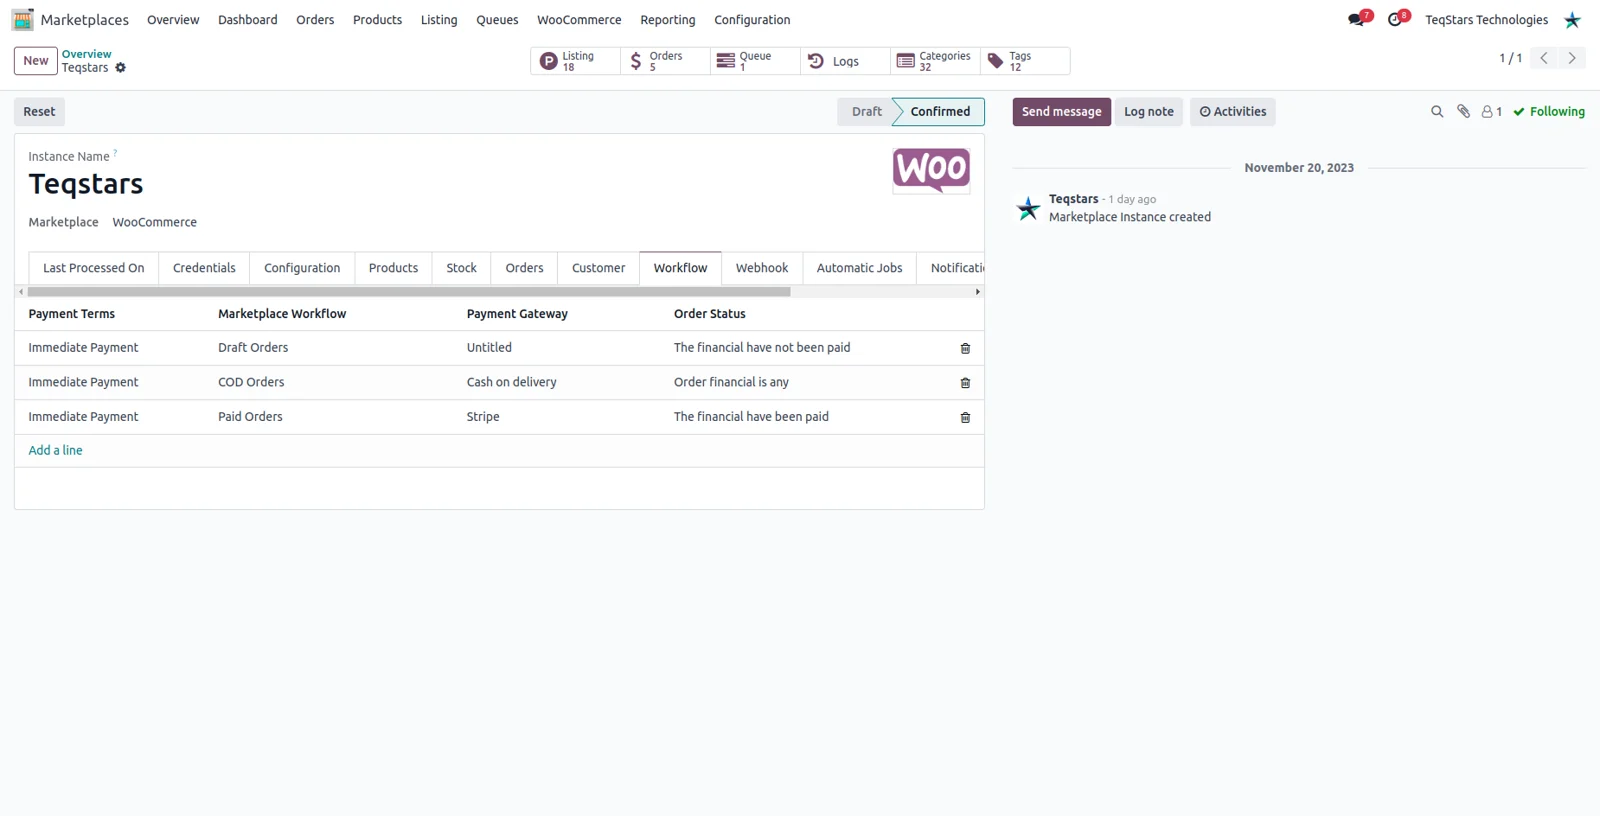
Decide how paid orders are processed
Each row matches a WooCommerce payment gateway and a financial status of paid, unpaid or any. You pick the workflow that runs for that combination, covering confirmation, invoicing, delivery validation and payment registration, plus the payment term applied to the order. An order with no matching row is skipped and written to the log, so you can add the row and import it again.
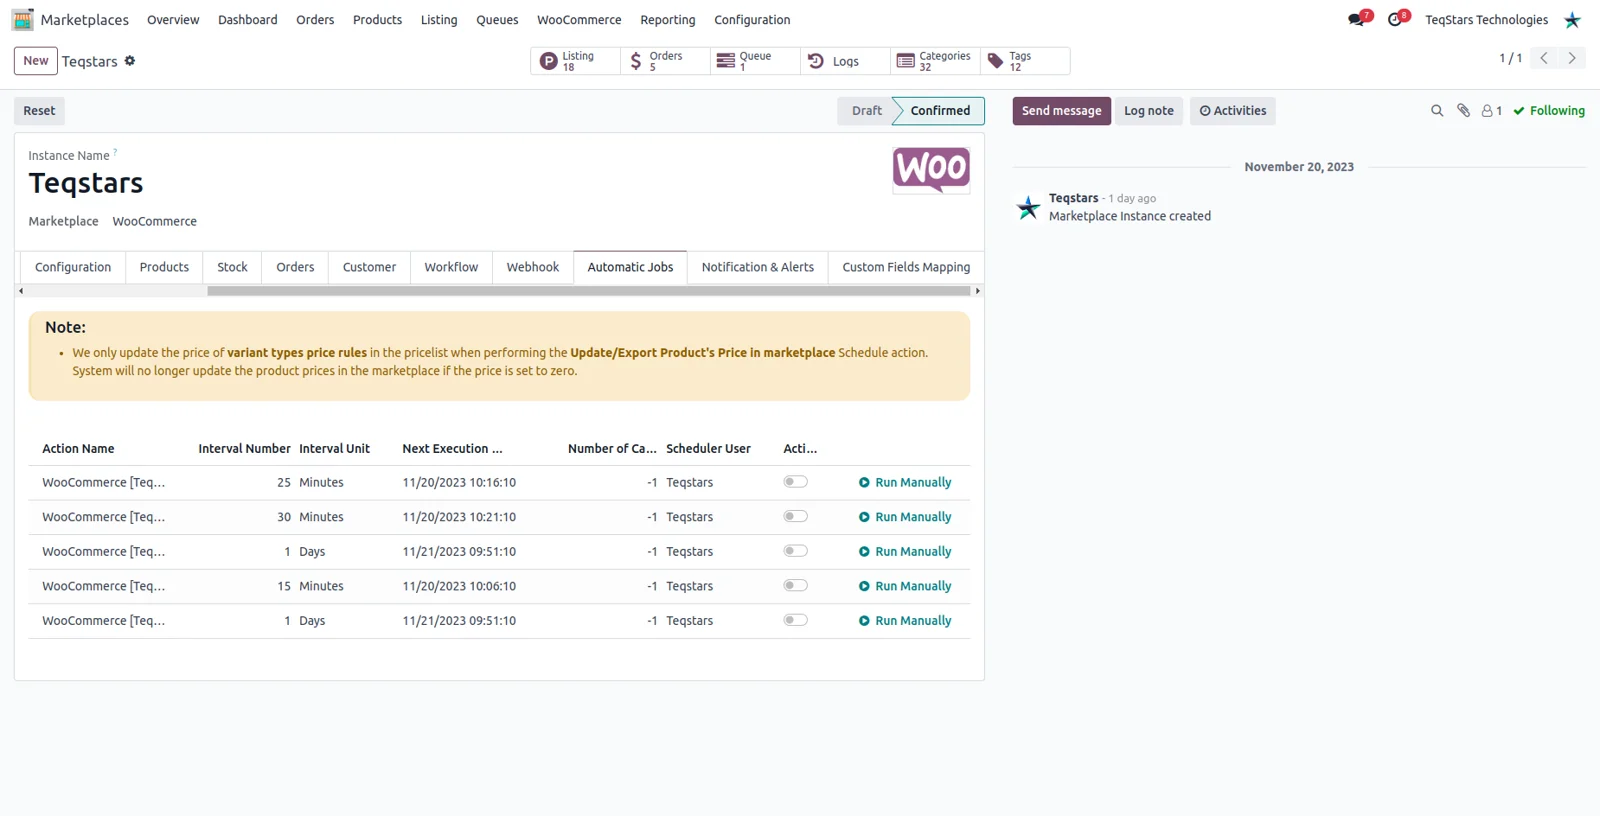
Set the intervals for unattended syncs
Each store carries its own timing for the jobs you want running. Order import, order status export and stock export each have an interval of their own, while stock import and price export run daily. Change the interval, then switch a job on. It is worth spacing them apart so the server is not doing everything at once.
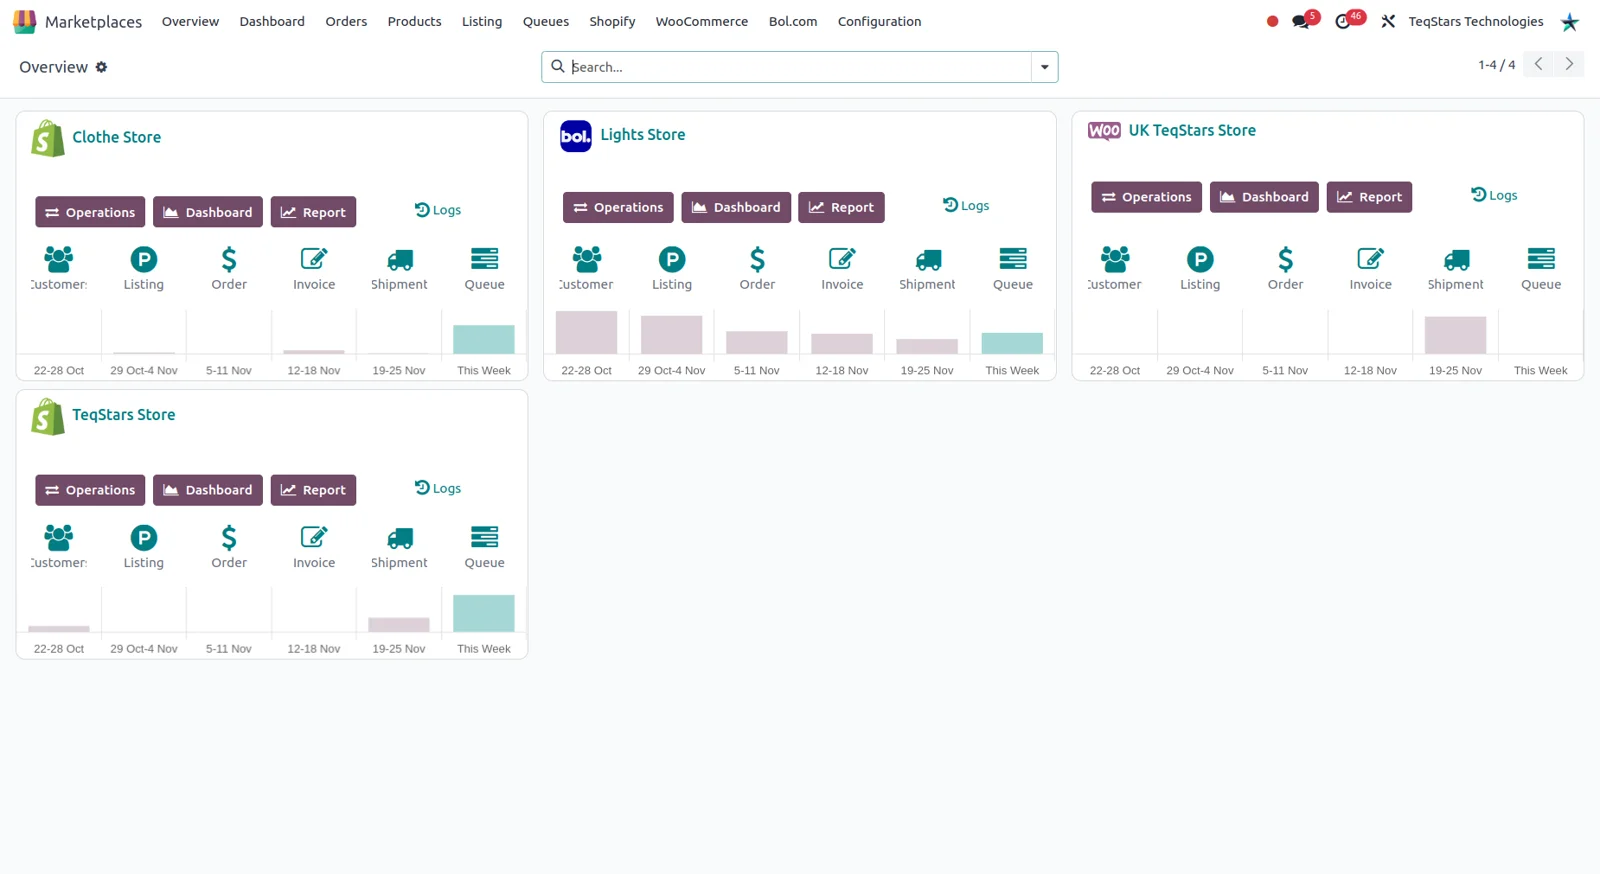
Compare your stores on one dashboard
The dashboard reports on sales across the stores you have connected, so you can weigh one against another. It highlights top-selling products, categories and the countries buyers order from. Each store also has its own view with the same breakdown for that shop alone. Because the orders sit in Odoo, the regular Odoo reports and accounting use the same figures.
What buyers say on the Odoo Apps Store
5 out of 5, from8 reviews
Odoo WooCommerce Connector is rated 5 out of 5 from 8 reviews on the Odoo Apps Store, the latest in .
Read the reviews on the Odoo Apps StoreGreat addon with great support!
We've installed multiple Teqstars add-ons for our Odoo system and have been consistently satisfied with their performance. The add-ons work flawlessly, and we've received excellent support from Gops and the development team whenever needed. They've also delivered several custom modifications quickly and at reasonable prices. We highly recommend Teqstars to anyone looking to optimize their Odoo instance to better meet their business needs.
This woocommerce integration addon works great without any problem. Developers were available to have some videocalls to better explain the addon functionalities. Very satisfied.
Jigs and the Team are amazing!!!
They are patient, very knowledgeable, and fast at what they do. They are great listeners in what you need and are quick to comply with the needed items. I truly appreciate their help when I inquire about items needed. So far the best company to work with for integration! Thank you guys!
amazing support
Recently installed Odoo WooCommerce Integration, and I can't say enough about how great it is. This app simplifies the connection between your Odoo ERP and WooCommerce store. It's incredibly user-friendly and automates data synchronization seamlessly, saving time and reducing errors.
What truly sets the Odoo WooCommerce Integration apart is its exceptional customer support. When dealing with technical apps like this, responsive and helpful support is crucial, and they deliver on all fronts. Their team is not only knowledgeable but also genuinely committed to assisting their users. I've had a few questions and concerns along the way, and each time, I received prompt and effective solutions. It's clear that the developers are dedicated to providing top-notch customer service.
In conclusion, the Odoo WooCommerce Integration is a shining example of a well-executed integration solution. It seamlessly connects your Odoo ERP with your WooCommerce store, streamlining your business operations. With its range of well-thought-out functionalities and top-tier customer support, this app is a must-have for anyone looking to enhance their e-commerce experience. I wholeheartedly recommend it to anyone seeking a powerful and user-friendly integration solution.
As usual we keep using the module of teqstars on our projects. Recommended.
Supported Odoo versions
| Odoo version | Editions | Hosting | Price | Latest release | |
|---|---|---|---|---|---|
| 20.0 | Community & Enterprise | Odoo.sh · On-premise | €329.99 | 20.0.1.0.0 | Buy Docs |
| 19.0 | Community & Enterprise | Odoo.sh · On-premise | €329.99 | 19.0.1.0.8 | Buy Docs |
| 18.0 | Community & Enterprise | Odoo.sh · On-premise | €329.99 | No release notes | Buy |
| 17.0 | Community & Enterprise | Odoo.sh · On-premise | €329.99 | No release notes | Buy |
Support for Odoo WooCommerce Connector
The developers who build the app answer your tickets.
- Free app support from purchase
- 60 days
- First response in working hours, typical
- 4–6 hours
- Support hours, 10:00–18:00 IST
- Mon–Fri
How to connect WooCommerce to Odoo
-
Step 1
Create the store API keys
In WordPress, open WooCommerce, Settings, Advanced, REST API and click Add key. Give it a description, choose the user and set permissions to Read/Write. Copy the consumer key and secret, since the secret is shown once.
-
Step 2
Add the store in Odoo
Go to Marketplaces, Configuration, Instance and click New. Name the store, select WooCommerce, then paste the shop URL with https, the consumer key and the secret. Click Test Connection. A guided wizard covers the same ground.
-
Step 3
Set products, stock and orders
Choose the warehouse, the pricelist and whether missing SKUs create Odoo products. Pick the quantity basis for stock export, the order statuses you want imported, and how taxes on imported orders are applied.
-
Step 4
Add workflows and confirm
Add a workflow line for each payment gateway and financial status you accept, then click Confirm. Odoo checks the credentials and brings in the store currency, the weight unit and the gateways your store has enabled.
-
Step 5
Import the catalog and start the jobs
Run Import Listings, Import Categories and Import Tags from the Operations wizard to fill Odoo with your store data. Then set the intervals on the automatic jobs tab and switch on the ones you need.
Questions before you buy
Not answered here? Talk to the team.