PrestaShop orders, stock and catalog handled in your Odoo backend
Orders from your PrestaShop store come into Odoo as sale orders with lines, shipping and gift wrapping. Stock syncs both ways, and the fulfillment state goes back to PrestaShop once the delivery is validated. Several stores can run in one database.
- Odoo 17.0 – 20.0
- Community & Enterprise
- Odoo.sh · On-premise
-
Not for
Odoo Online
Top seller on the Odoo Apps Store
- sales on the Odoo Apps Store
- 3,000+
- apps published
- 100+
- countries running them
- 100+
Store admin before and after the PrestaShop connector
Without the connector by hand
-
Retype PrestaShop orders into Odoo one by one.
-
Copy buyer billing and shipping addresses into contact forms.
-
Edit store stock figures after every Odoo delivery.
-
Re-enter product texts, prices and images in the store back office.
-
Open the PrestaShop back office to mark each order shipped.
-
Check whether a canceled store order was ever entered in Odoo.
With the connector automatic
-
Order import can run on a schedule you set and switch on.
-
Invoice, delivery and company contacts are created while orders import.
-
Stock export can run on a schedule you set for items with Manage Stock on.
-
Export Listings sends texts, price, images and more when you run it.
-
The fulfillment state is pushed once the delivery is fully validated.
-
Orders canceled in PrestaShop are canceled in Odoo at the next import.
Products, orders and stock moving between PrestaShop and Odoo
Every object the connector handles, which way it travels and what triggers it.
| Data | Direction | What happens & when |
|---|---|---|
| Orders |

 PrestaShop to Odoo
|
The import operation, or the order job on a schedule you set. |
| Customer contacts |
PrestaShop to Odoo
|
Created from the order addresses while that order imports. |
| Order fulfillment state |
Odoo to PrestaShop
|
Delivery fully validated, then pushed by click or the status export job. |
| Order cancellation |
Odoo to PrestaShop
|
You cancel in Odoo, then click Cancel In PrestaShop. |
| Products and variants |
Both ways
|
You run Import Listings, Export Listings or Update Listings. |
| Stock quantities |
Both ways
|
Manual runs, or jobs on schedules you set. |
| Product images |
Both ways
|
Imported with listings, sent by listing export or Update Images. |
| Categories and tags |
PrestaShop to Odoo
|
Referenced by an imported product, or the import operation. |
| Brands |
Both ways
|
Import Brands, or a listing export that uses a brand with no store id. |
Odoo PrestaShop Integration features
Import store orders as Odoo sale orders
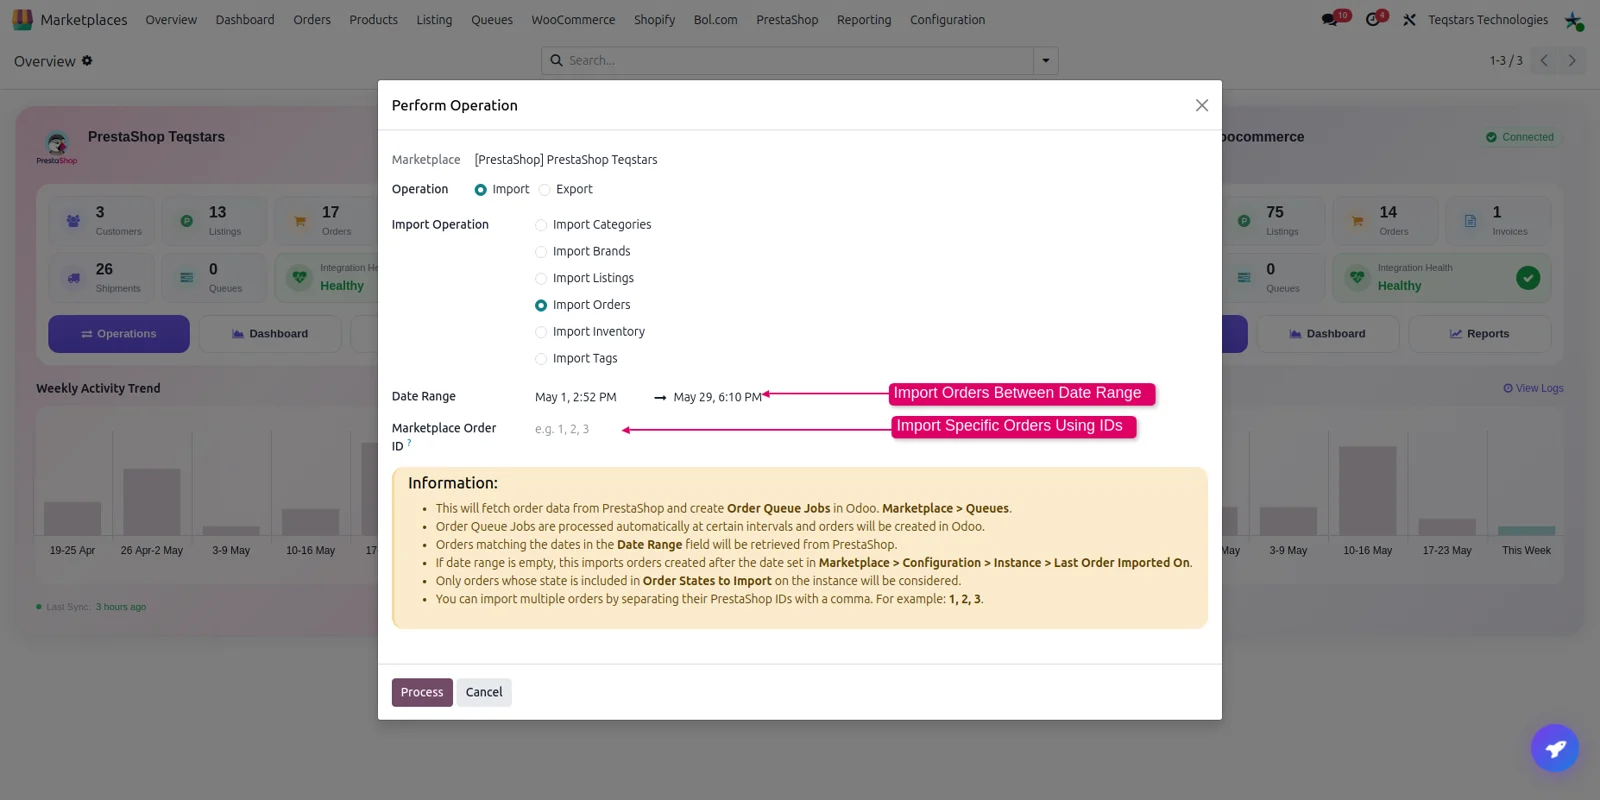
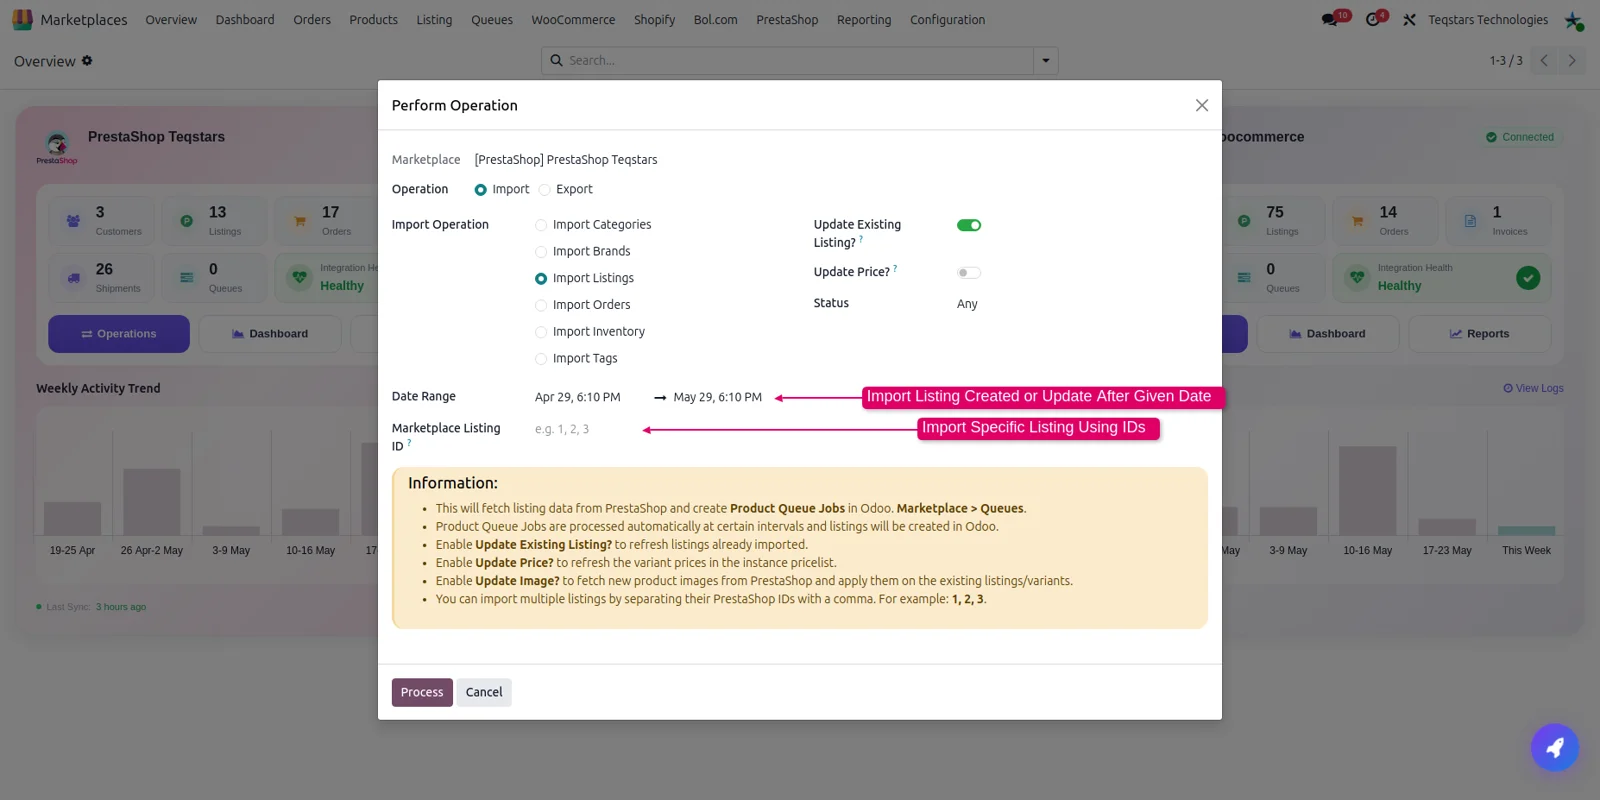
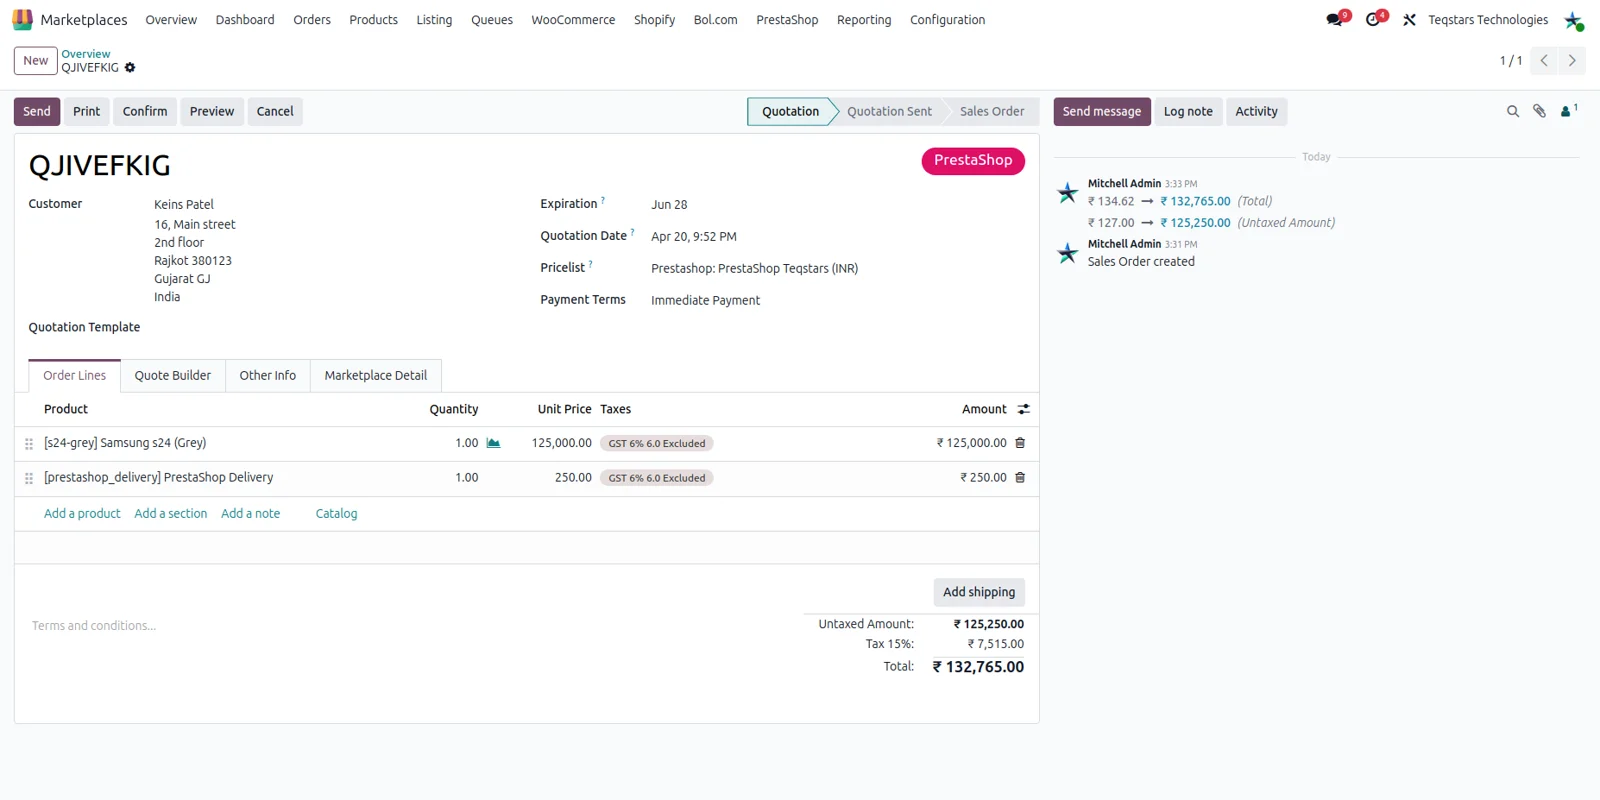
Every PrestaShop order becomes an Odoo sale order carrying its item lines, shipping, gift wrapping and discounts. In the import screen you choose a date range or type specific PrestaShop order numbers separated by commas, then click Process. Only orders whose state sits in your Order States to Import filter are fetched. Once you switch the order job on, new orders arrive on the schedule you set.
Decide how each imported order is processed
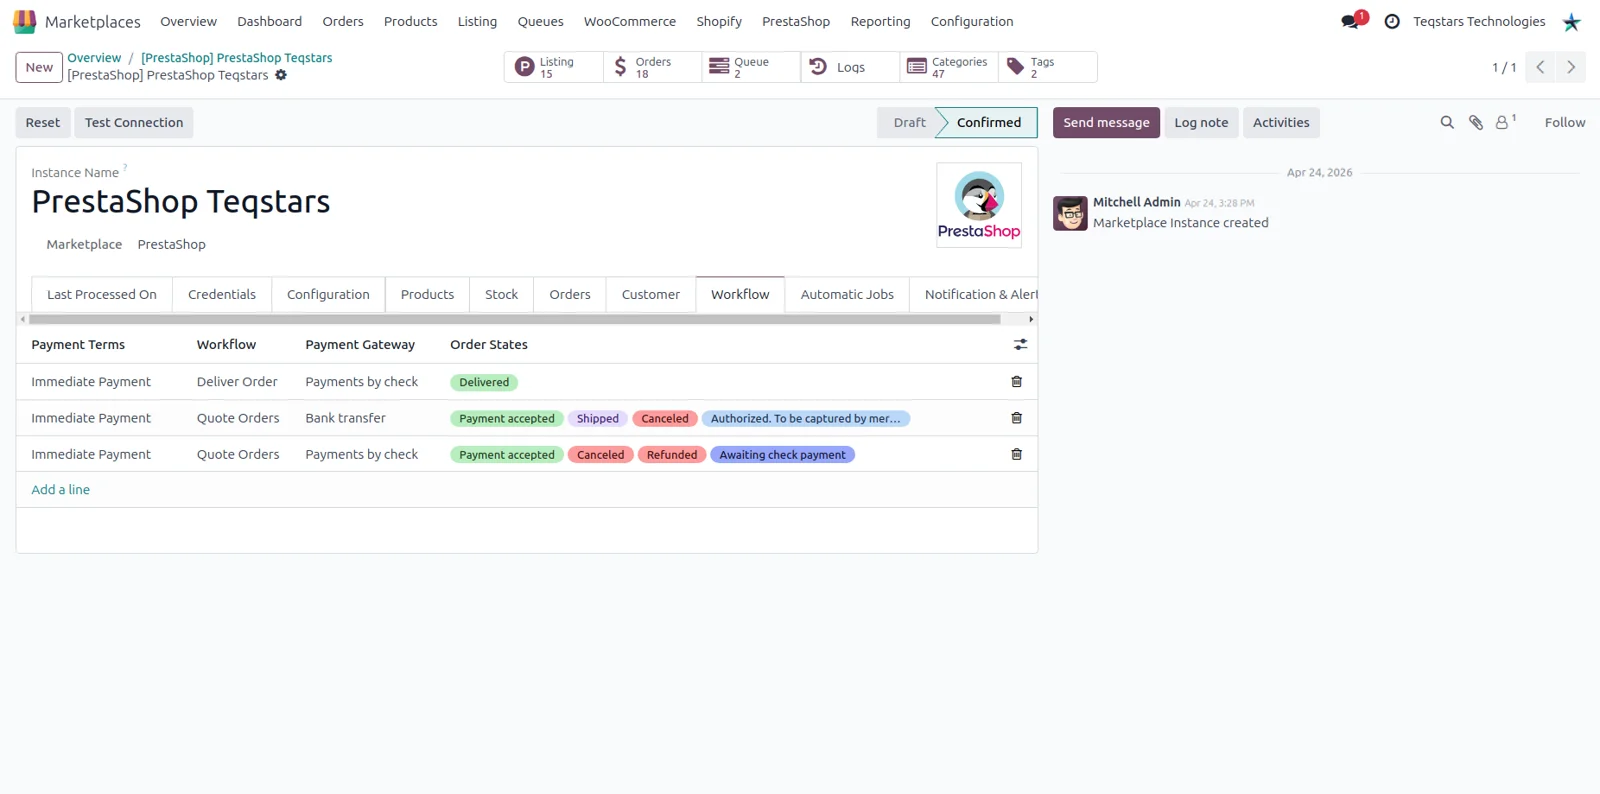
You write one rule per PrestaShop order state and payment method, so paid card orders and cash-on-delivery orders can be handled differently. The matching workflow confirms the order, creates the invoice, validates the delivery or registers the payment, and it applies the payment term you set. Orders sitting in your fulfillment state, or in a paid and delivered state, get their Odoo delivery validated during import.
Send the shipping status back to your store
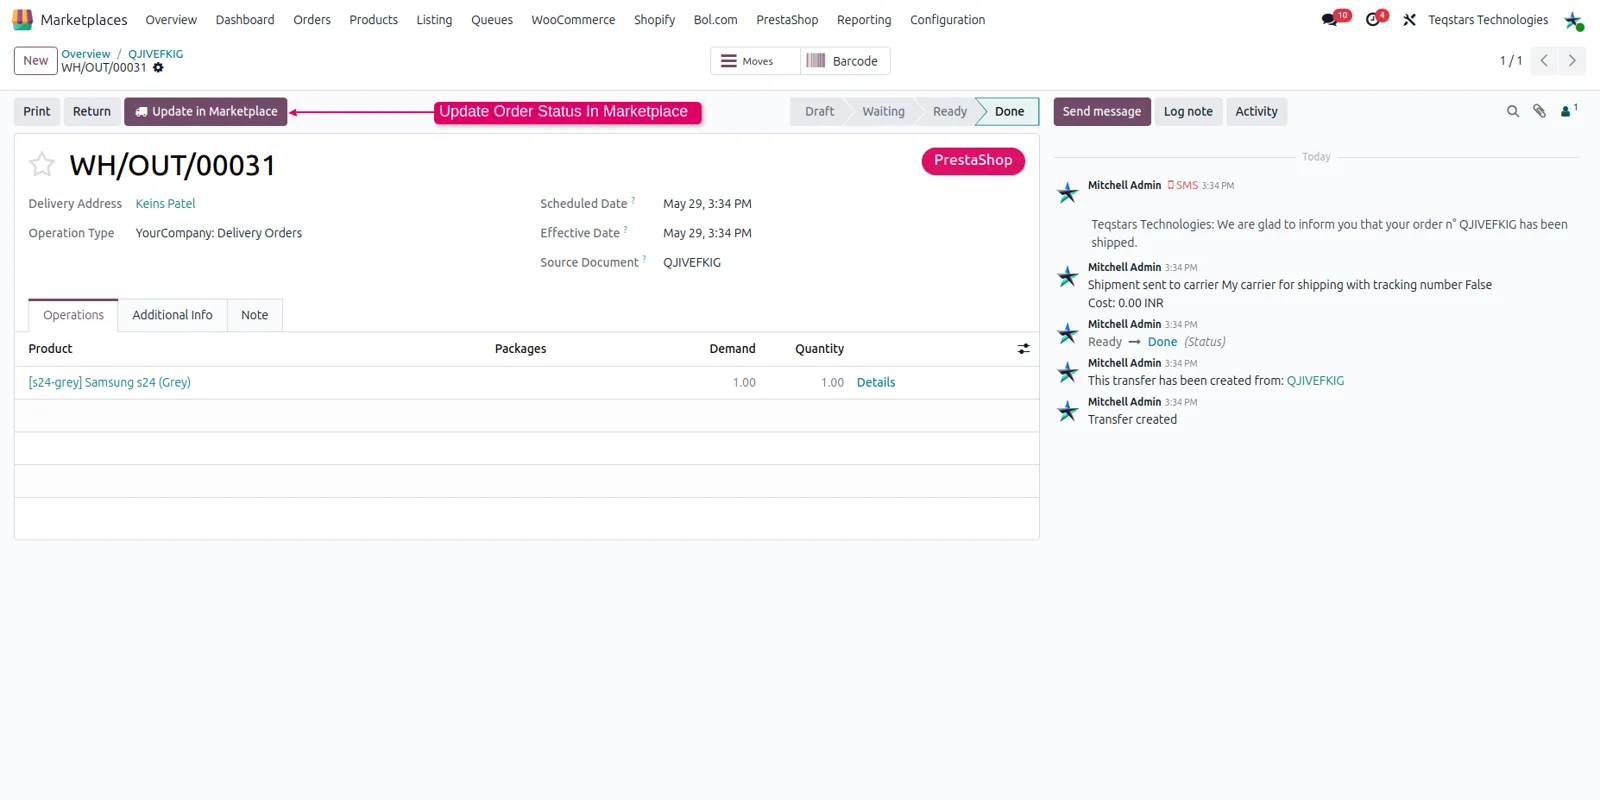
When a delivery is fully validated in Odoo, the PrestaShop order moves to the fulfillment state you picked on the store settings. Push one delivery with the Update in Marketplace button, run the export operation to cover every eligible order, or switch on the status export job, which runs on a schedule you set. Partly validated deliveries stay untouched until they are complete.
Publish Odoo products to PrestaShop
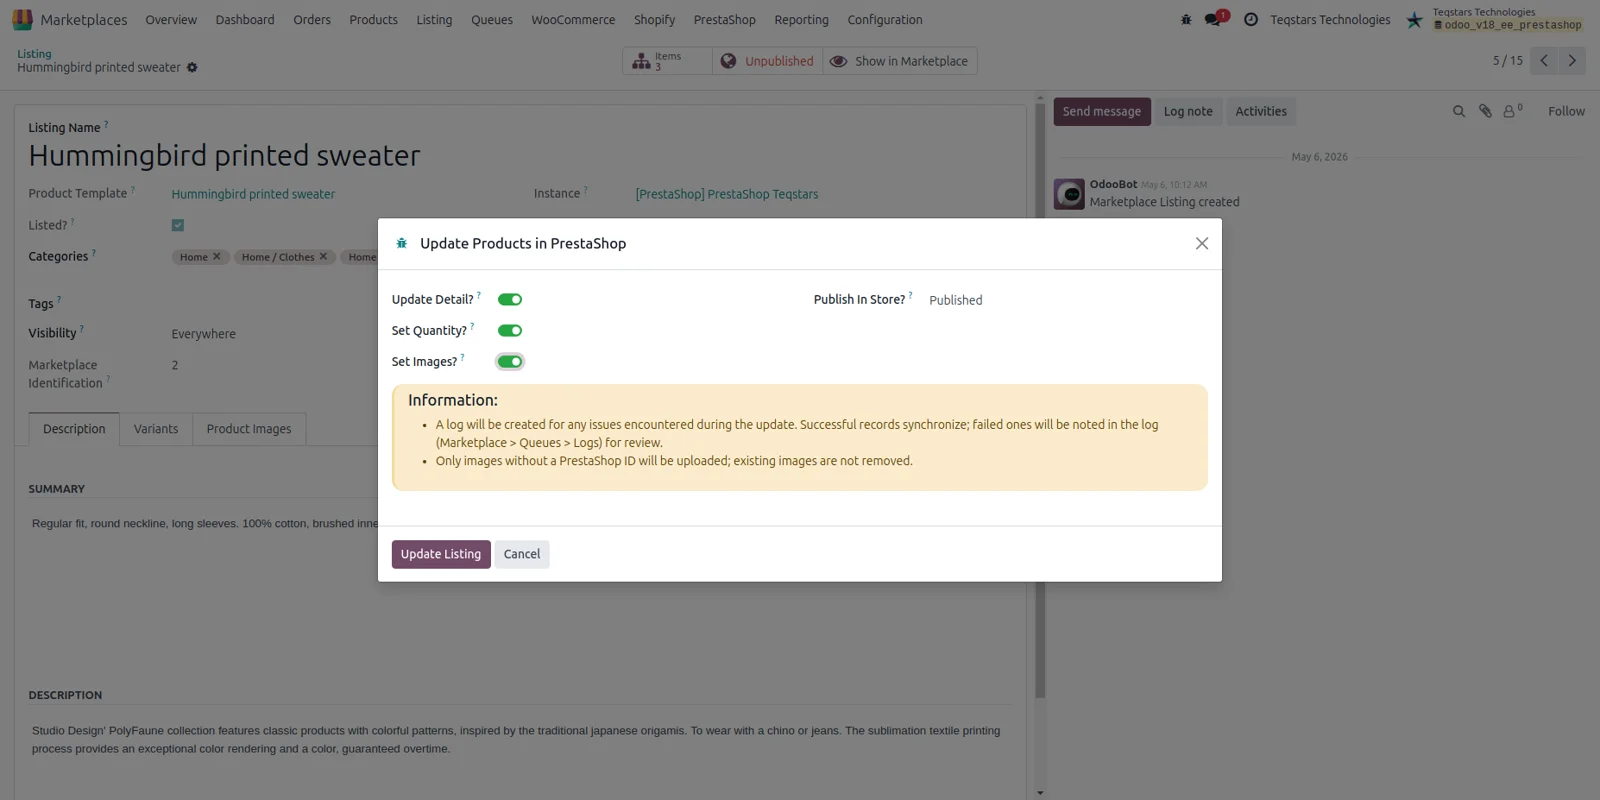
Export Listings creates the product in your store with its name, description and short description in each active store language. Reference, barcode, weight, pricelist price and cost go with it, along with images, categories, brand and the attribute combinations. You decide whether it arrives Published or Unpublished. Up to 30 listings go out per run, and each variant needs an Internal Reference.
Bring the store catalog into Odoo
Import Listings pulls PrestaShop products in as Listings, with one Listing Item per combination and a single item for simple products. Texts, reference, barcode, price, weight, attributes, categories, tags, brand and images come across. Matching against your Odoo products follows the Sync Product With choice: barcode, reference or either. When nothing matches and Create Odoo Products is on, Odoo creates the product for you.
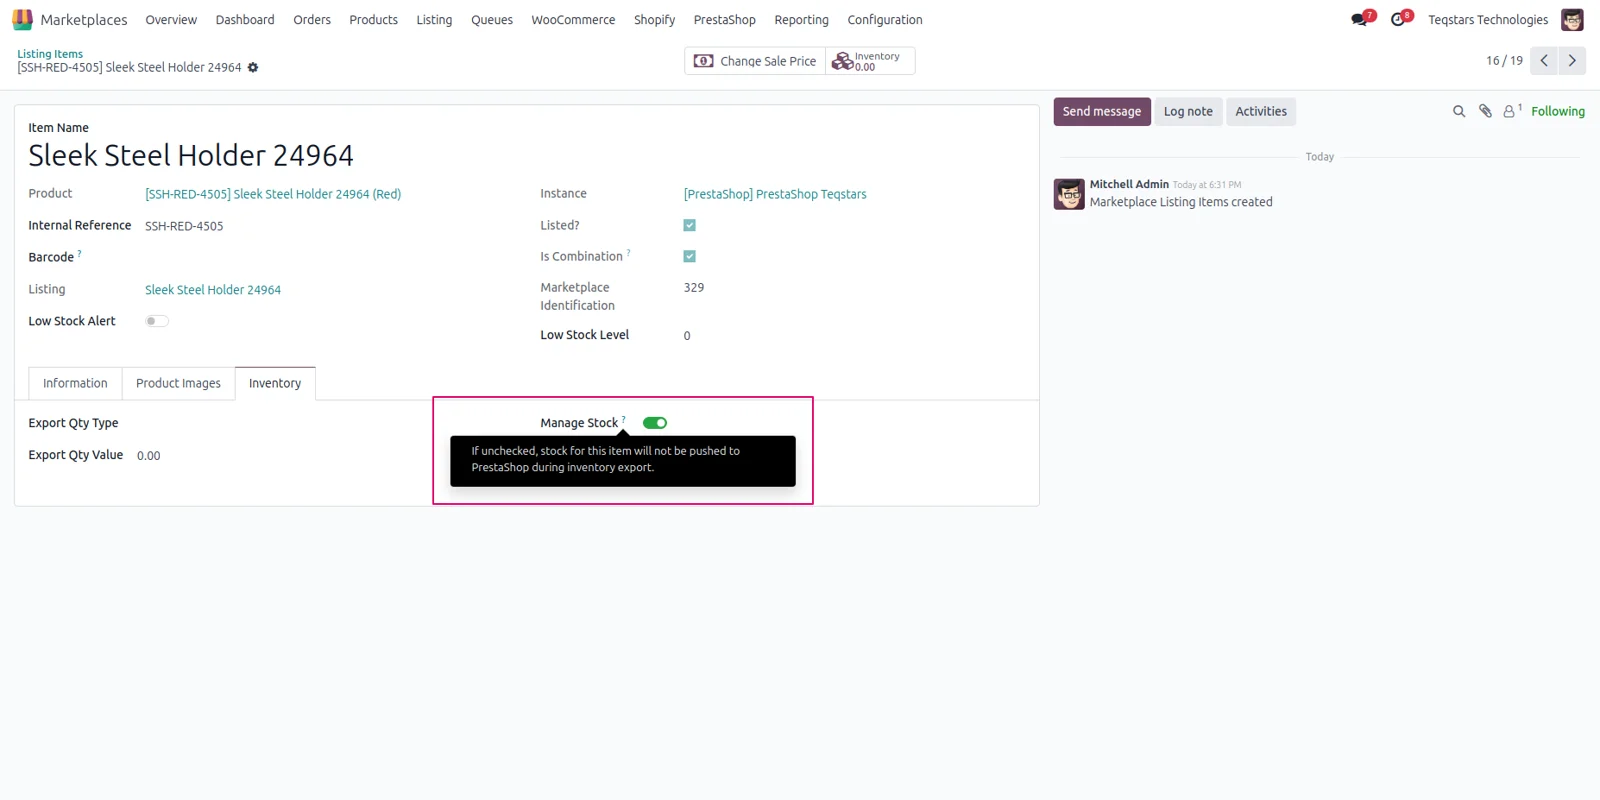
Control exported stock per variant
The Manage Stock toggle on a listing item decides whether that quantity is sent to PrestaShop, because the store has no per-item flag of its own. The number sent follows your Stock Based On choice of On Hand, Forecasted or Free To Use. Run the inventory export yourself or let the scheduled job send it. Stock read from PrestaShop is written into the warehouse as an inventory adjustment.
Buyer contacts created while orders import
You get a clean customer list because contacts are built from the addresses on each imported order. Separate invoice and delivery contacts appear when the order carries different addresses, and a parent company contact is added when Create Company Contact is on and the address names a company. Name, email, phone and the full address come across, and each contact is tagged PrestaShop.
Supported Odoo versions
| Odoo version | Editions | Hosting | Price | Latest release | |
|---|---|---|---|---|---|
| 20.0 | Community & Enterprise | Odoo.sh · On-premise | €200 | No release notes | Buy |
| 19.0 | Community & Enterprise | Odoo.sh · On-premise | €200 | 19.0.1.0.1 | Buy Docs |
| 18.0 | Community & Enterprise | Odoo.sh · On-premise | €200 | No release notes | Buy |
| 17.0 | Community & Enterprise | Odoo.sh · On-premise | €200 | No release notes | Buy |
Support for Odoo PrestaShop Integration
The developers who build the app answer your tickets.
- Free app support from purchase
- 60 days
- First response in working hours, typical
- 4–6 hours
- Support hours, 10:00–18:00 IST
- Mon–Fri
How to connect PrestaShop to Odoo
-
Step 1
Create a webservice key
In the PrestaShop back office open Advanced Parameters, then Web Service. Turn the webservice on, add a key, set it to Enabled and grant view, add, modify and delete rights on the resources you plan to sync.
-
Step 2
Add the store in Odoo
Go to Marketplaces, Configuration, Instance and click New. Name the store, pick PrestaShop, then paste the Shop URL with https and the key. Click Test Connection before going further. A guided onboarding wizard covers the same ground.
-
Step 3
Set products, stock and orders
Choose the warehouse, pricelist and how products are matched. Pick the quantity basis for exports, the states you want imported, the fulfillment state pushed back and the tax handling for imported orders.
-
Step 4
Add your order workflows
On the Workflow tab, pair each PrestaShop order state and payment method with the workflow Odoo should run and the payment term to apply. Orders with no matching rule are logged and skipped.
-
Step 5
Confirm and schedule the jobs
Click Confirm so Odoo reads the store currency, weight unit, timezone, languages, order states and payment methods. On the Automatic Jobs tab, set the intervals you want and activate them, spreading them out rather than running everything at once.
Questions before you buy
Not answered here? Talk to the team.