Mailchimp audiences, campaigns and sale orders all driven by Odoo data
This Mailchimp Odoo integration imports audiences, members and campaign stats into Odoo Email Marketing, and sends contacts, products and sale orders back to Mailchimp. Subscribe and unsubscribe changes can update Odoo live. Ships for Odoo 17.0, 18.0 and 19.0.
- Odoo 17.0 – 20.0
- Community & Enterprise
- Odoo.sh · On-premise
-
Not for
Odoo Online
Top seller on the Odoo Apps Store
- sales on the Odoo Apps Store
- 3,000+
- apps published
- 100+
- countries running them
- 100+
Contact and campaign work before and after the Mailchimp Connector
Without the connector by hand
-
Export Odoo contacts to a CSV file and upload it to Mailchimp
-
Repeat the same audience update by hand every day
-
Log in to Mailchimp to read opens, clicks and bounces
-
Notice unsubscribes and dead addresses only when someone checks
-
Retype order values in Mailchimp, or go without revenue data
-
Guess why half a contact upload was rejected
With the connector automatic
-
Select contacts, click Export to MailChimp and pick the audiences
-
A schedule you switch on exports every contact matching your filter
-
Sent, opened, clicked and bounced figures show on the Odoo mailing
-
Live updates opt contacts out and blacklist cleaned addresses in Odoo
-
Confirmed orders are exported with their amount and product lines
-
Logs name each rejected record, and failed jobs retry three times
Contacts, campaigns and orders between Odoo and Mailchimp
Every object the connector handles, which way it travels and what triggers it.
| Data | Direction | What happens & when |
|---|---|---|
| Audiences and mailing lists |

 Both ways
|
You import audiences in the operations wizard, or export an Odoo list to Mailchimp. |
| Members and mailing contacts |
Both ways
|
Fetch Members, the hourly member sync, or a live subscriber change in Mailchimp. |
| Campaigns |
Both ways
|
You import campaigns, or press Send, Schedule or Test on an Odoo mailing. |
| Campaign statistics |
Mailchimp to Odoo
|
An hourly job, for as long as the Campaign Report period lasts, 5 days by default. |
| Email templates |
Both ways
|
Imported together with campaigns, or exported when you push an Odoo template. |
| Segments and tags |
Mailchimp to Odoo
|
Importing an audience, or clicking Fetch Segments on it. |
| Merge fields |
Mailchimp to Odoo
|
Importing an audience, or clicking Fetch Merge Fields on it. |
| Ecommerce stores |
Both ways
|
Fetch Stores on the account, or Create Store on a store you filled in Odoo. |
| Products and variants |
Both ways
|
A product import in the wizard, or Export/Update To Mailchimp on an Odoo product. |
| Sale orders |
Odoo to Mailchimp
|
The cog menu action, or a daily job once you enable it on the store. |
MailChimp Connector features
Send and track campaigns from Odoo
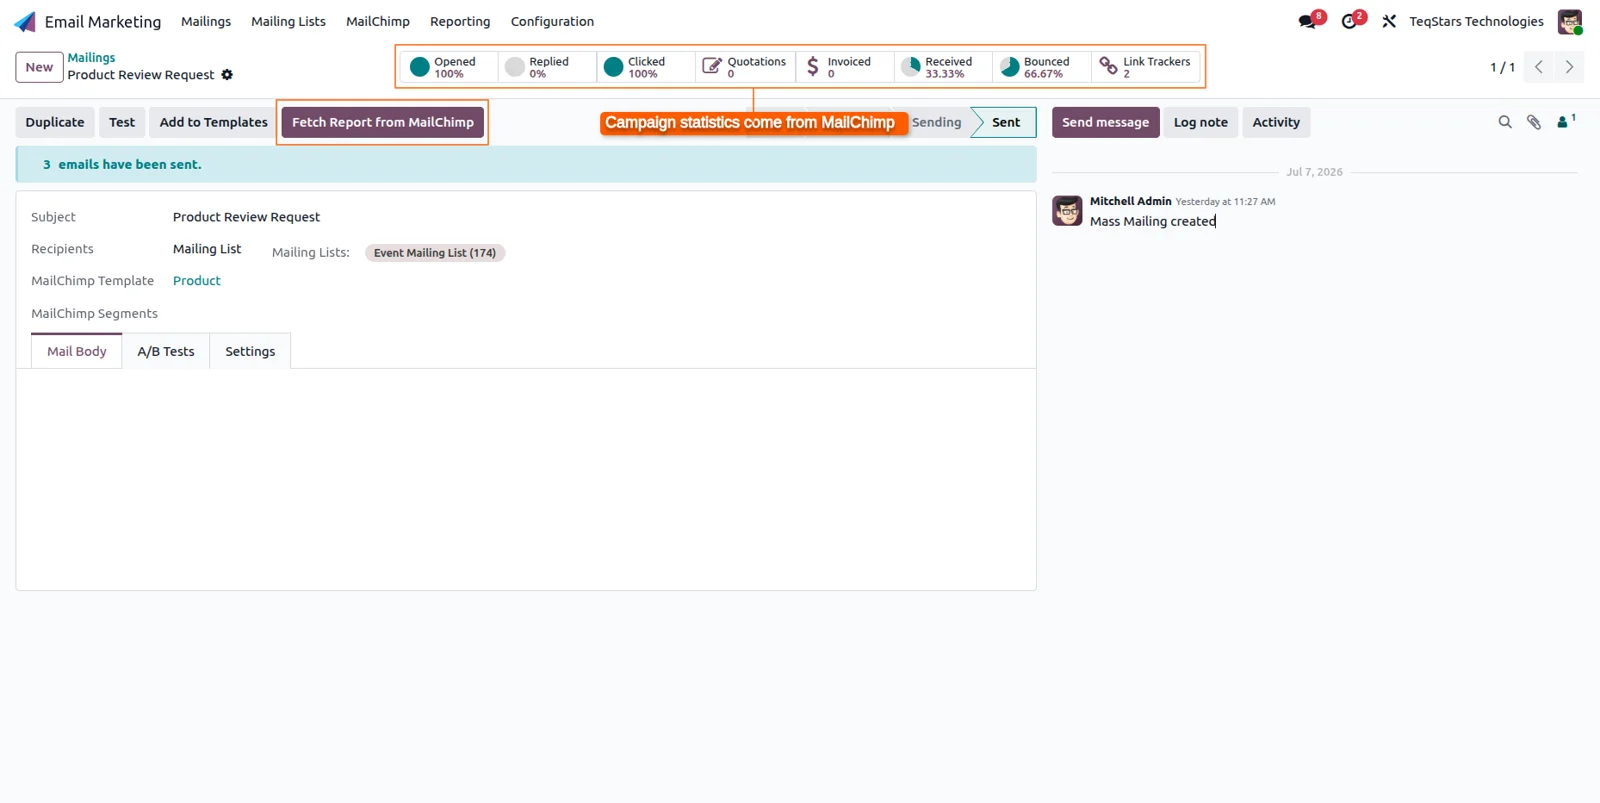
Create a mailing in Email Marketing, choose a Mailchimp template and an audience, then press Send, Schedule or Test. Mailchimp does the sending, and the sent, opened, clicked, received and bounced numbers come back onto the Odoo mailing. Click Fetch Report from MailChimp for the latest figures, and open the link trackers to see which links people clicked.
Subscriber changes reach Odoo live
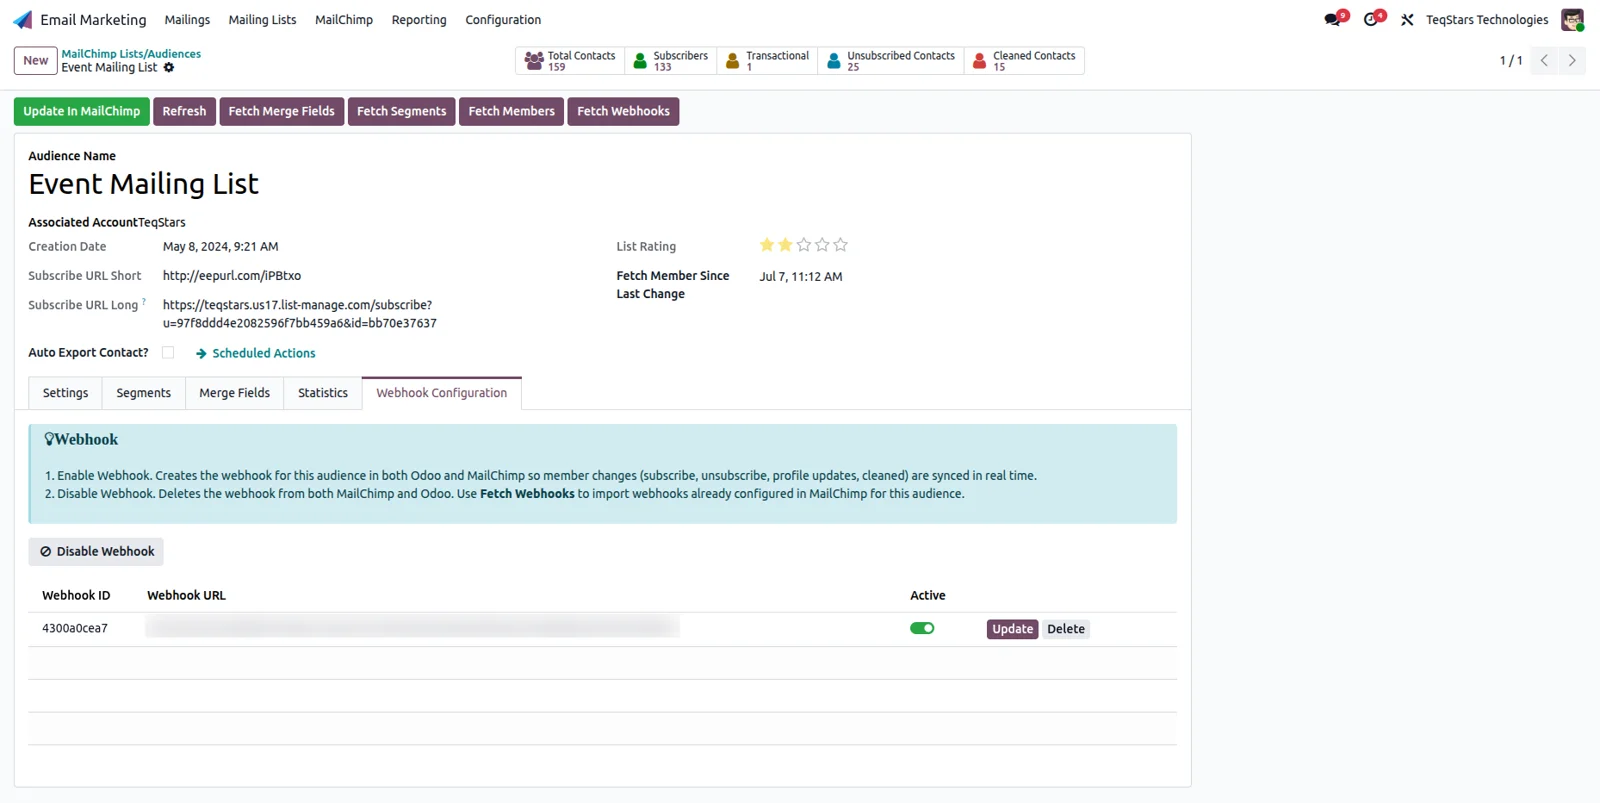
Turn on live sync for an audience and Mailchimp tells Odoo the moment someone subscribes, unsubscribes, updates a profile or is marked cleaned. A cleaned address is blacklisted in Odoo and opted out, so nobody emails it again. Mailchimp can only send these events to a public HTTPS address. The hourly audience sync still runs and picks up anything missed.
Fill an audience from an Odoo filter
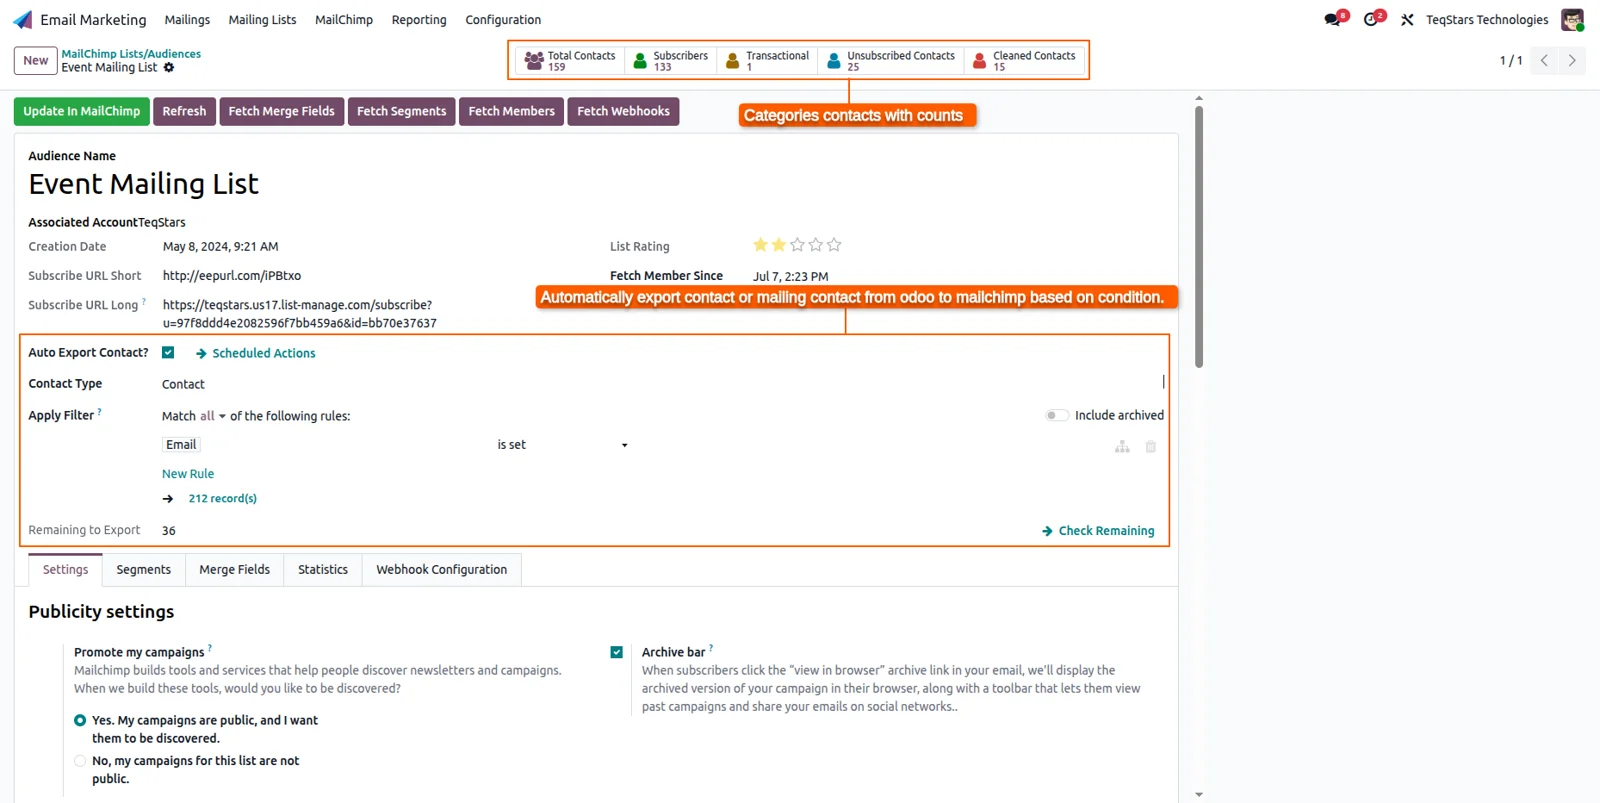
Instead of pushing contacts one at a time, switch on Auto Export Contact on the audience. Choose customers or mailing contacts, then define the condition, for example email is set. An hourly job sends every matching record to that Mailchimp audience. Check Remaining shows who is still waiting, and each export fills the mapped merge fields and copies the contact's Odoo tags.
Send sale orders with revenue lines
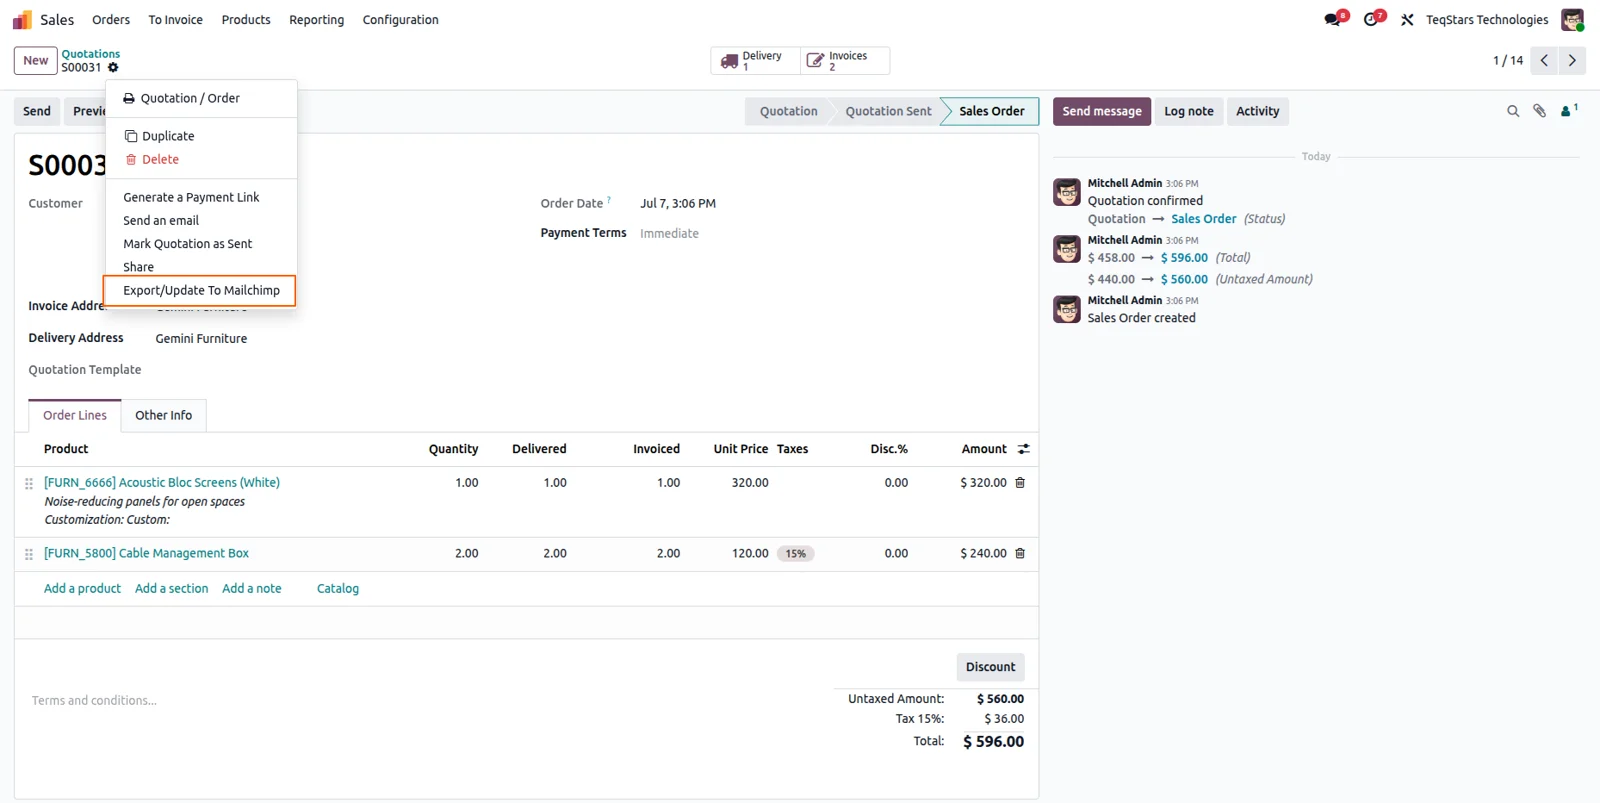
Select orders in Sales, choose Export/Update To Mailchimp from the cog menu and pick the accounts. Each order reaches Mailchimp with its amount and product lines, attached to the customer's Mailchimp contact, ready for revenue reports and purchase-based automations. Enable the daily export on a store and set a cut-off date, and orders confirmed or changed after it are exported for you.
Run one import or export at a time
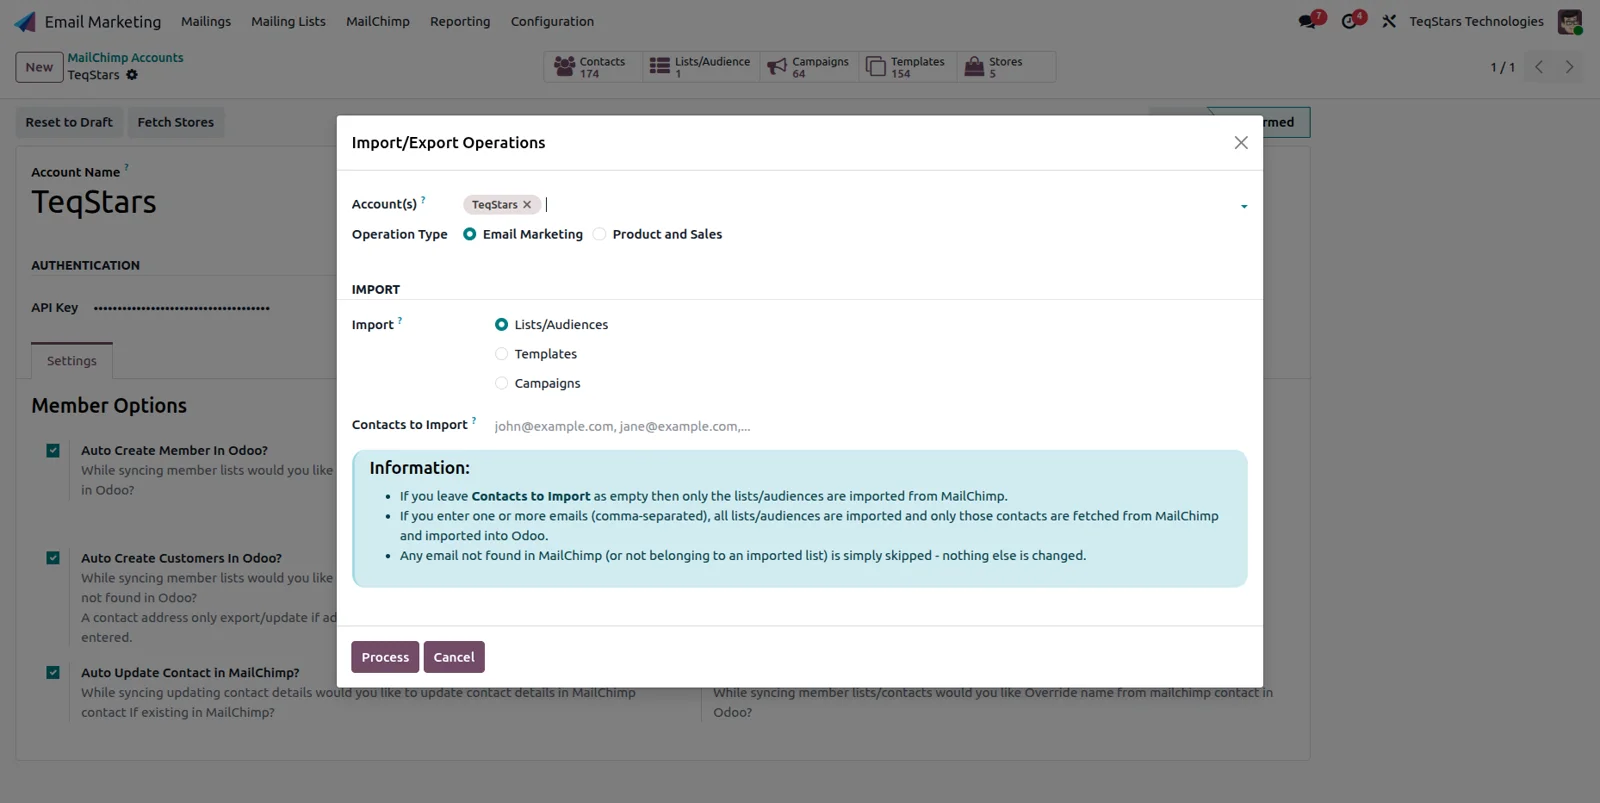
The operations wizard brings existing Mailchimp data into Odoo. Select your accounts, then choose Email Marketing for audiences, templates and campaigns, or Product and Sales for store products. Click Process and Odoo imports what you picked. Choosing campaigns also imports their templates, because every campaign is built on one. Big imports are split into background batches so they finish gradually.
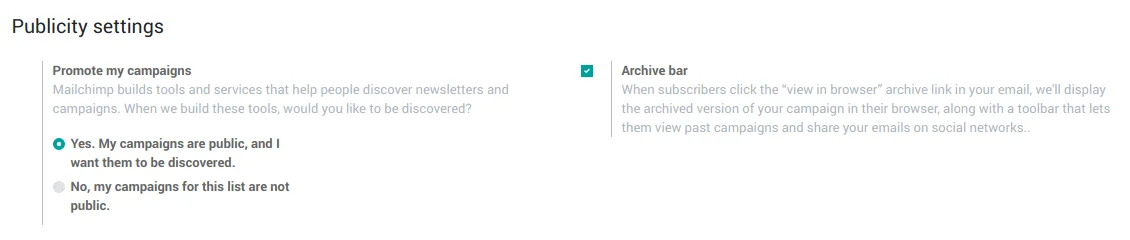
Edit audience settings inside Odoo
Each Mailchimp audience becomes a native Odoo mailing list with a full form. The Settings tab mirrors the Mailchimp configuration: double opt-in, GDPR fields on signup forms, the default From name, subject and language for campaigns, and the permission reminder and address Mailchimp requires in every footer. Change what you need and click Update In MailChimp to push it back.
What buyers say on the Odoo Apps Store
5 out of 5, from13 reviews
MailChimp Connector is rated 5 out of 5 from 13 reviews on the Odoo Apps Store, the latest in .
Read the reviews on the Odoo Apps StoreGreat App! Works very well. Tech support was great as well on helping us get this up and running.
Supported Odoo versions
| Odoo version | Editions | Hosting | Price | Latest release | |
|---|---|---|---|---|---|
| 20.0 | Community & Enterprise | Odoo.sh · On-premise | €349.99 | 20.0.1.0.1 | Buy Docs |
| 19.0 | Community & Enterprise | Odoo.sh · On-premise | €349.99 | 19.0.1.0.3 | Buy Docs |
| 18.0 | Community & Enterprise | Odoo.sh · On-premise | €349.99 | No release notes | Buy |
| 17.0 | Community & Enterprise | Odoo.sh · On-premise | €349.99 | No release notes | Buy |
Support for MailChimp Connector
The developers who build the app answer your tickets.
- Free app support from purchase
- 60 days
- First response in working hours, typical
- 4–6 hours
- Support hours, 10:00–18:00 IST
- Mon–Fri
MailChimp Connector video tutorial
MailChimp Connector tutorial
Learn how to set up and use the MailChimp Connector in Odoo, step by step.
How to connect Mailchimp to Odoo
-
Step 1
Create and paste the API key
In Mailchimp, create an API key. It already carries the data-center suffix, such as us20. In Odoo, open Email Marketing, Mailchimp, Accounts, add an account and paste the key in.
-
Step 2
Run the Quick Setup wizard
Click Quick Setup on the account. Five steps test the key, decide whether members become mailing contacts only or customers too, link audiences to Odoo lists, map merge fields, and confirm the account.
-
Step 3
Import what already exists
Open Mailchimp Operations, select your accounts and choose Email Marketing for audiences, templates and campaigns, or Product and Sales for store products. Click Process. Each audience appears as an Odoo mailing list tagged MailChimp.
-
Step 4
Switch on the automatic syncs
On the account, enable member auto-sync and auto-update. On each audience, set the auto export filter, then click Enable Webhook so Mailchimp notifies Odoo of subscriber changes right away.
Questions before you buy
Not answered here? Talk to the team.